Software
The most important first
 39C3 2025
39C3 2025
All data for the software can be found here: Firmware Repo (PlatformIO): github.com/HazeCore/CCCamp_Nametag_Firmware
Firmware project
 CCCamp 2023
CCCamp 2023
To make the firmware easy and fast to use, I set up the project in “PlatformIO”. PlatformIO is a tool that makes it possible to automatically install the toolchain for many different microcontrollers with a uniform configuration and then compile the firmware with it.
This has the advantage that you can get started quickly even without much experience with the toolchain and can primarily only deal with the code. The only prerequisite is that Platformio is installed. This is done with a few clicks and can be installed either globally or directly in an IDE such as VSCode.
Programming the microcontroller
CCCamp 2023
CCCamp 2023
The Attiny402 series microcontroller on the nameplate can be programmed directly via UPDI. There is no boot loader or anything similar. There is simply not enough memory for this.
Right at the beginning: Don’t be afraid of UPDI. It is a protocol of its own, but you can easily build your own programmers. I have two versions in my project. One with an Arduino Nano and one with an FTDI adapter. Both are available as targets in PlatformIO.
Variant 1: Arduino Nano as programmer
Advantages:
- Easy to set up
- Massively faster programming than via FTDI adapter (approx. 8 times faster)
Materials needed:
- Arduino nano with jtag2udpi firmware
- breadboard
- 1 kOhm resistor
- 4.7 kOhm resistor
More Information about the Setup can be found here! I try to carry some resistors with me. The rough steps are then:
- flash the Arduino Nano with the firmware.
- 1K resistor between the reset pin and the 5V pin of the Arduino Nano (prevents the Arduino Nano from resetting)
- 4.7k resistor between D6 and the UPDI pin of the nameplate / ATTiny402
- connect the Arduino Nano to the PC
- start PlatformIO and select “default” upload at the target
- PlatformIO compiles the firmware, downloads all necessary programs and starts the upload.
Your nameplate should now be reflashed! If you have any problems, please contact me. I will gladly try to help you.
Variant 2: FTDI adapter as programmer
If you don’t have an Arduino nano at hand, you can also use a generic USB serial adapter (e.g. the FT232RL). If someone really convinces me that they want to play with the firmware, I have a few adapters in my bag that make the ftdi directly UPDI capable. These are much slower than the Arduino nano but much more comfortable.
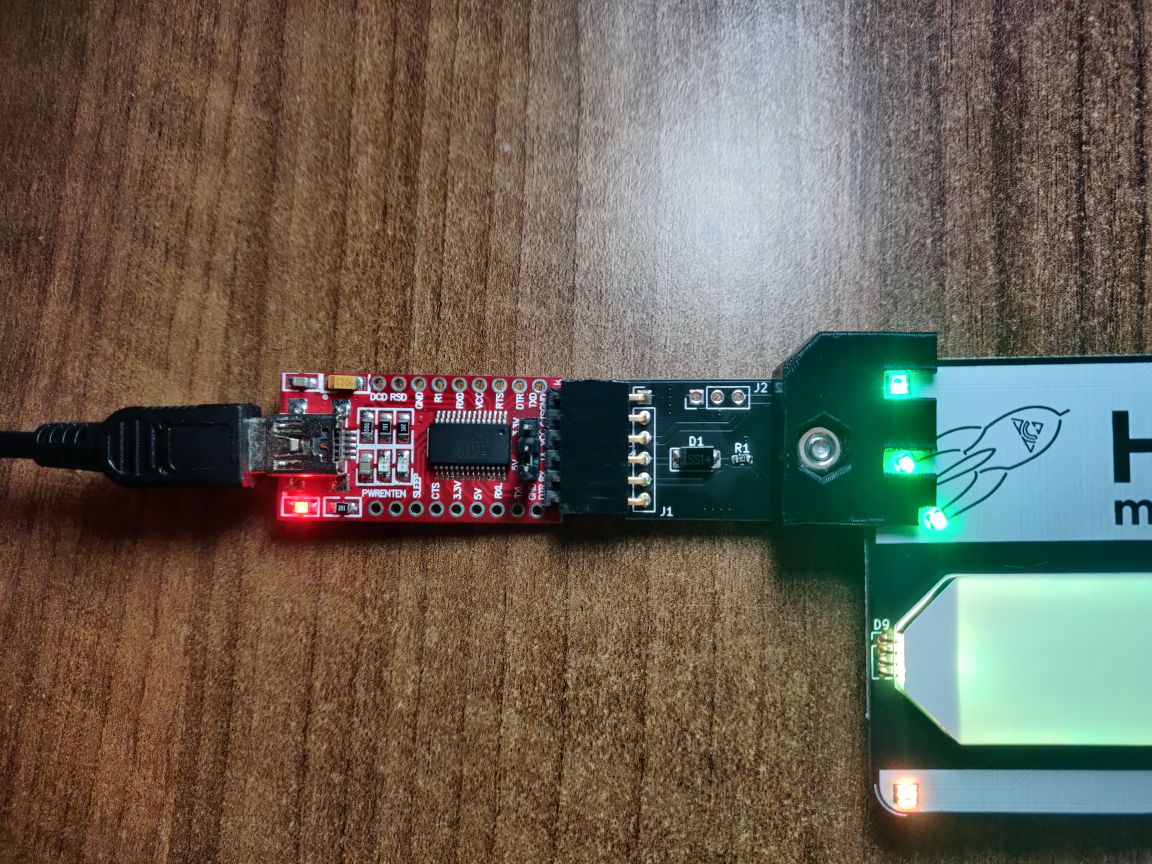
If I no longer have any adapters, it is also possible to simply rebuild the schematic here:
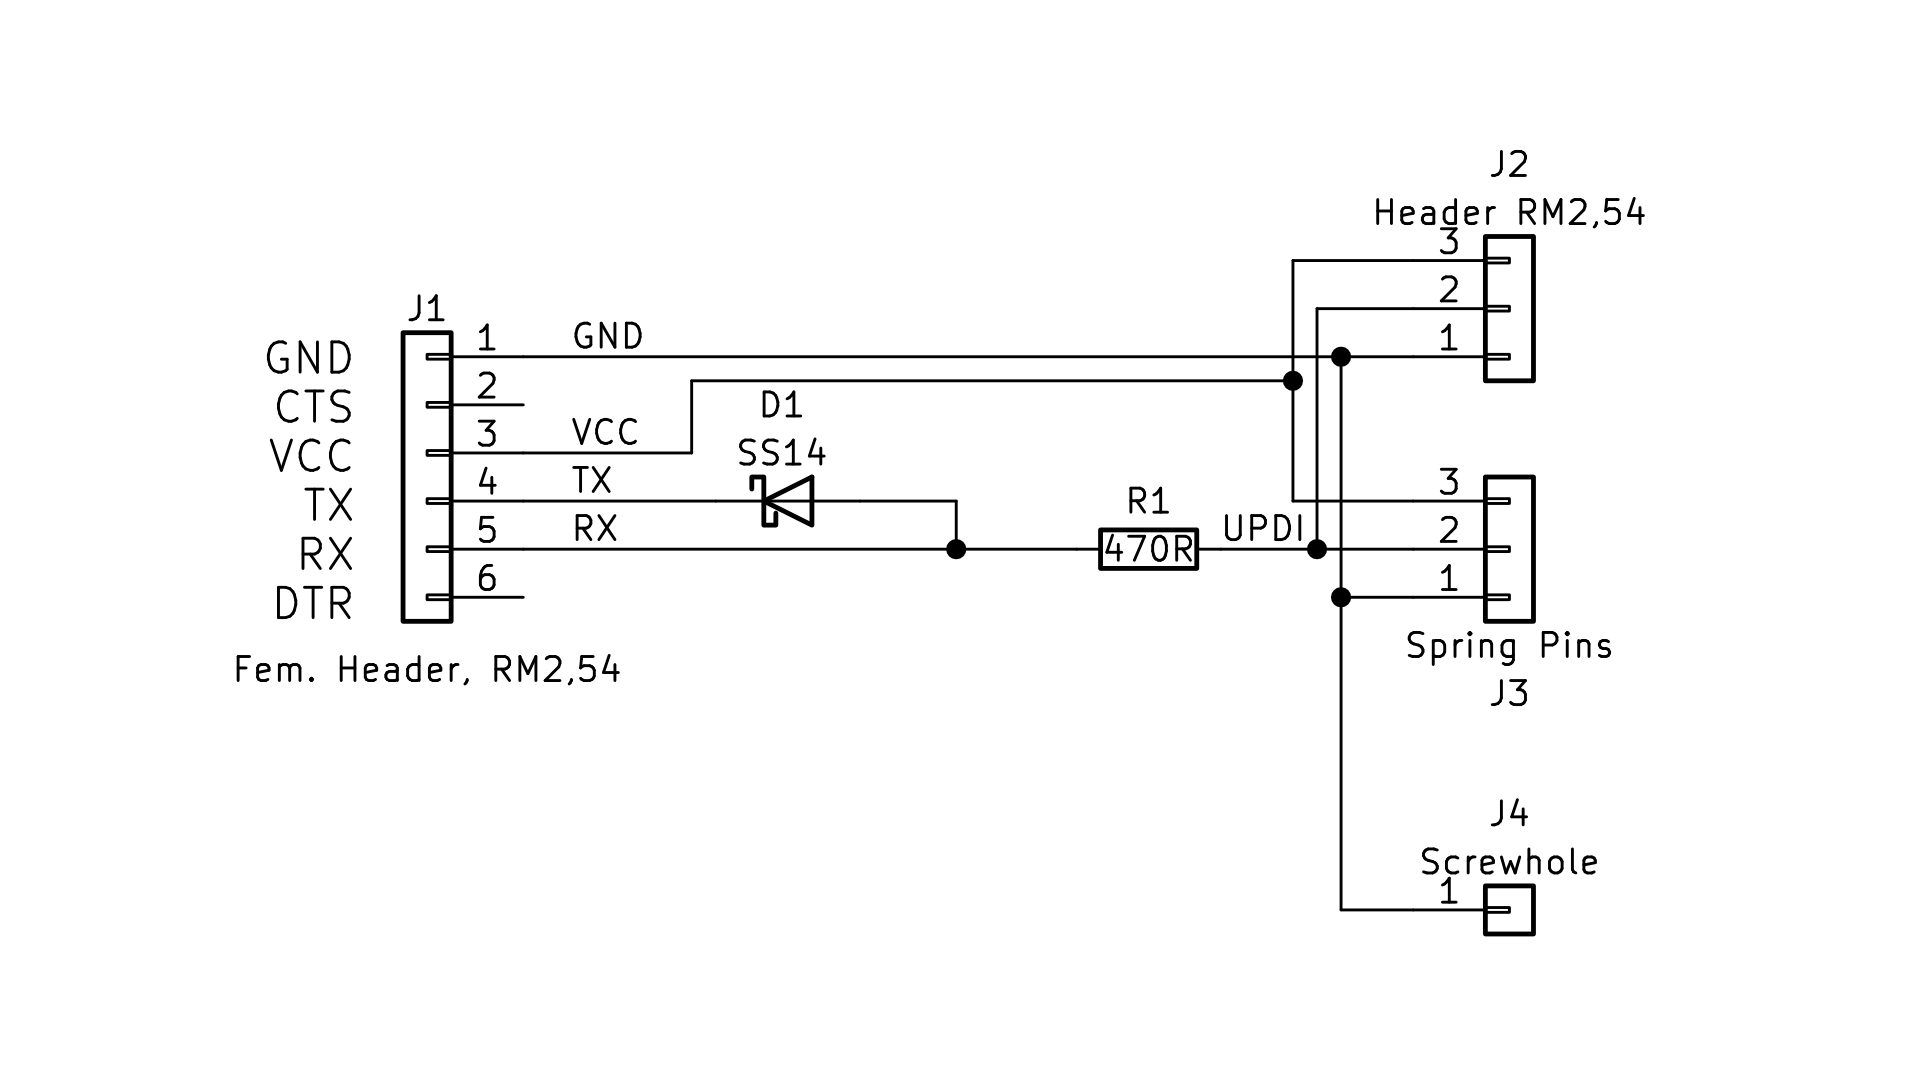
Materials required:
- FTDI adapter (e.g. FT232RL)
- breadboard
- 470 Ohm resistor
- Schottky diode (e.g. SS14)
Useeful Website about the Setup here! Here, too, I try to have a few suitable resistors and diodes with me. The rough steps are then:
- connect the FTDI adapter to the PC
- 470 Ohm resistor between RX and UPDI pin of the nameplate / ATTiny402
- connect a Schottky diode between TX and RX pin of the FTDI. (The Diode has to point from RX to TX)
- start PlatformIO and select “SerialUPDI” upload at the target
- PlatformIO compiles the firmware, downloads all necessary programs and starts the upload.
If you have Problems, same as above: Come and find me. I will gladly try to help you.